Gutter guards come in several different materials, shapes, colours and systems and it is important finding the correct type for your home.
The gutter guard market is primarily dominated by 2 types of systems; Insertion and Ski-slope.
These come in various materials ranging from plastic to metal.
Do thorough research and find out which system you believe would best fit your roof, house location, price and protection level.
After identifying which type of gutter guard you prefer, you can start the gutter guard installation!
Leaf Stopper is one of Australia’s leading brands in gutter guard protection.
We deliver an aluminium gutter mesh system that fits tile roofs, common deck metal roofs and corrugated roofs.
Aluminium mesh keeps pests and leaves out of your gutters and allows water to effectively flow in.
In addition, it will not corrode and it’s fire safe.
Installing Aluminium Gutter Guard Mesh
If you have decided that aluminium gutter mesh is the system that will suit your home the best, here is a detailed description on how to install the gutter guards yourself!Remember, accidents can happen while working at heights on ladders, trestles and roofs.
We urge you to take care at all times and that you make sure your ladder/platform is firmly secured and to use a harness if working from the roof.
If you are not eager to get up on the roof yourself, remember that you can use a registered installer that will do the job for you.
View this video to see a quick overview on how to install Leaf Stopper.
Installing Gutter Guards On A Tile Roof
With so many different types of tile roofs installing gutter guards won't always be the same, however, we aim to provide as many tips as possible.- Roll out the aluminium mesh along the entire straight length of the roof and gutter.
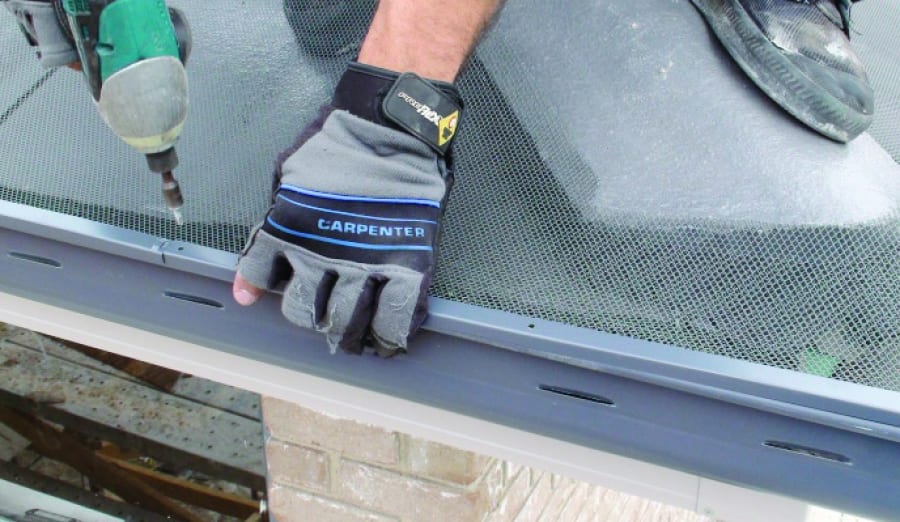
- Attach front edge of mesh to gutter using trimets.
- Using the 500mm long trimets ensures that your screws are fixed at the recommended 250mm spacing.
- Make cuts in the back of the mesh. Since the mesh does not stretch, it’s important to allow ‘relief’ cuts. This will allow the mesh to mould to the roof shape.
- Tuck the mesh under the tile.
- Finish off hips and ends. This involves cutting around the hips and cutting below the 2nd last row of tiles that are cemented to the hip.
For a more detailed description that includes step-by-step pictures download this installation guide.
Installing Gutter Guards On A Corrugated Roof
- Installing gutter guards on a metal roof is easy, roll out Leaf Stopper over the entire straight length of roof and gutter and cut to length.
- Attach front edge of mesh to gutter using trimets.
- Using the 500mm long trimets ensures that your screws are fixed at the recommended 250mm spacing.
- Make cuts in the back of the mesh. Since the mesh does not stretch, it’s important to allow ‘relief’ cuts. This will allow the mesh to mould to the roof shape.
- Install saddles (clips). On a corrugated roof the saddles are fixed on every 2nd rib, while on a deck profiled roof the saddles are placed on every rib.
- Repeat the process of fixing saddles on every 2nd corrugation to the end of the roof line.
How to buy DIY gutter guards
Leaf Stopper can be purchased in a very handy DIY packaged system in our online store that includes:- 250mm wide Mesh (in either 10m or 30m lengths)
- Trimets – to connect Mesh to edge of gutter using hexagon head screws.
- Saddles – That fasten the mesh to the top of the Corrugation.
- Coloured Screws to match for the Trimets and Saddles.
Find your closest store here.
Or purchase your own kit online here.
Installing gutter guards can be a fun DIY project and protecting your home and roof is a long-term investment.
Don’t skimp and risk detracting value from your home with gutter guard systems that don’t work or don’t last!

